Are you ready to enhance your Excel skills with some quick and easy Flash Fill magic? Look no further! In our latest YouTube video, “3 Flash Fill Excel Tips That Will Blow Your Mind“, we’ve dived deep into three incredibly useful Flash Fill tricks that will undoubtedly elevate your Excel game. Let’s break them down in an easy-to-follow manner, and trust me, by the end of this blog post, you’ll be using these tips like a pro!
Flash Fill Excel Tips
Tip 1: Adding Spaces Between Names
The Problem
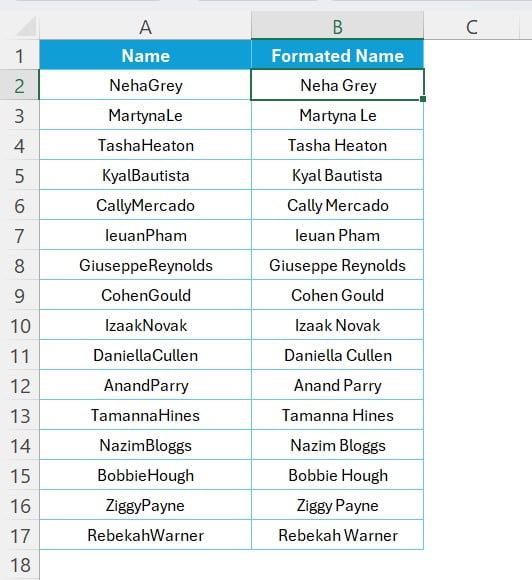
Often, we encounter data in Excel where first names and last names are mashed together, like “NehaGrey”. This formatting can be a headache, especially if you’re aiming for a professional look in your documents.
The Solution
Fortunately, Flash Fill comes to the rescue! Let’s go through the steps:
- Preparation: Imagine you have a list of names in range A2:A17, all squished together without spaces.
- Action: In cell B2, manually adjust the first name to the correct format, e.g., “NehaGrey” becomes “Neha Grey”.
- Flash Fill Magic: Select cell B3, hit Ctrl + E, and voilà! All names in your list are now neatly formatted with spaces.
Tip 2: Creating Short Names
The Problem
What if you need to create initials or short forms of names quickly? Manually doing this for a long list can be tedious.
The Solution
Here’s how Flash Fill simplifies this:
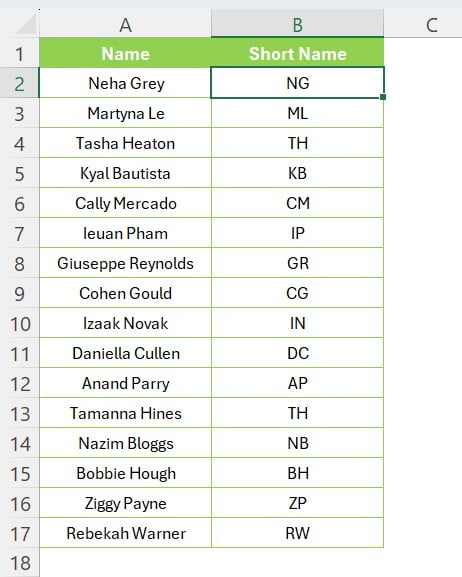
- Preparation: Again, your names are in range A2:A17, this time properly spaced.
- Action: In B2, convert the first full name into its short form, like turning “Neha Grey” into “NG”.
- Flash Fill to the Rescue: After selecting B3, press Ctrl + E. Suddenly, all names are transformed into their sleek, short versions.
Tip 3: Creating Dynamic Summaries
The Problem
Imagine you have a list of names and ages, and you want to create a summary for each person, such as “Neha is 42 years old.”
The Solution
Flash Fill makes this easy:
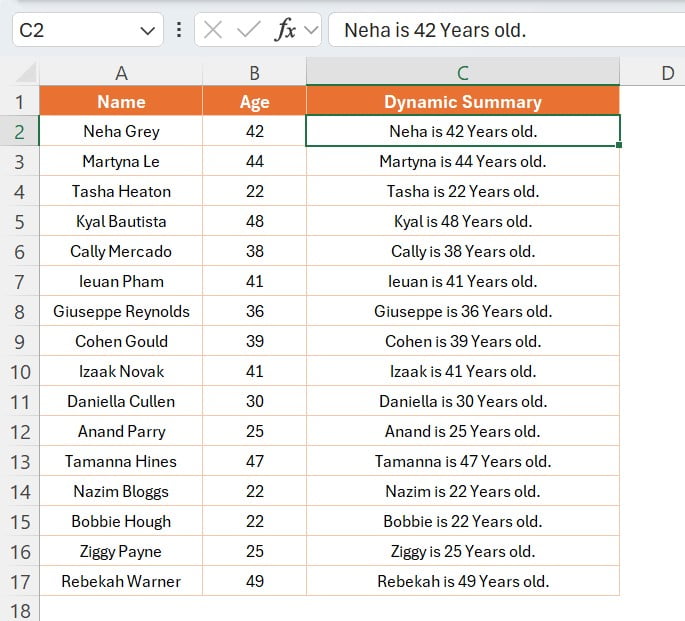
- Setup: Your names are in A2:A17, and corresponding ages in B2:B17.
- Initial Step: In C2, write a complete summary for the first person, e.g., “Neha is 42 years old.”
- The Final Flash Fill: Select C3, press Ctrl + E, and every person on your list now has a personalized summary.
And there you have it! Three incredibly useful tips using Flash Fill in Excel that are not only easy to implement but also incredibly time-saving. Whether you’re a beginner or an advanced user, these tricks are sure to make your Excel experience more efficient and enjoyable.
Remember, practice makes perfect. So, why not open up Excel and give these tips a try? You’ll be amazed at how much smoother your data management tasks become. Happy Excelling! 🌟
Visit our YouTube channel to learn step-by-step video tutorials
