Are you looking for an easy and efficient way to retrieve data in Excel? Whether you’re managing a small data set or handling large databases, Excel’s XLOOKUP Function in Excel is a lifesaver! In this post, we’ll walk you through how to use the XLOOKUP Function in Excel using a simple, yet practical example. By the end of this article, you’ll not only understand how XLOOKUP works, but also feel confident enough to use it in your own Excel tasks!
Why XLOOKUP is a Game-Changer
Before we dive into the example, let’s quickly talk about why XLOOKUP is so powerful. Unlike VLOOKUP or HLOOKUP, which are limited in their lookup direction and flexibility, XLOOKUP Function in Excel allows you to search for values in any direction (left to right, right to left, or even vertical). It also eliminates common errors like #N/A by providing a more user-friendly alternative to earlier lookup functions. Sounds exciting, right?
Now, let’s see how it works!
Our Example Data Set
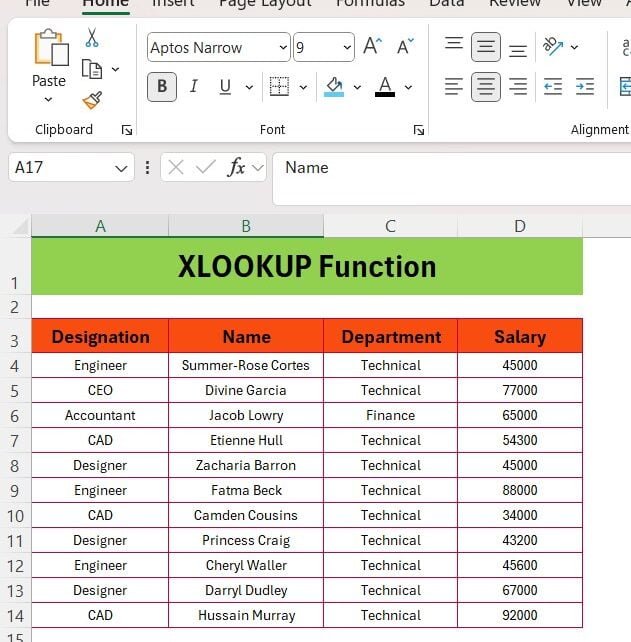
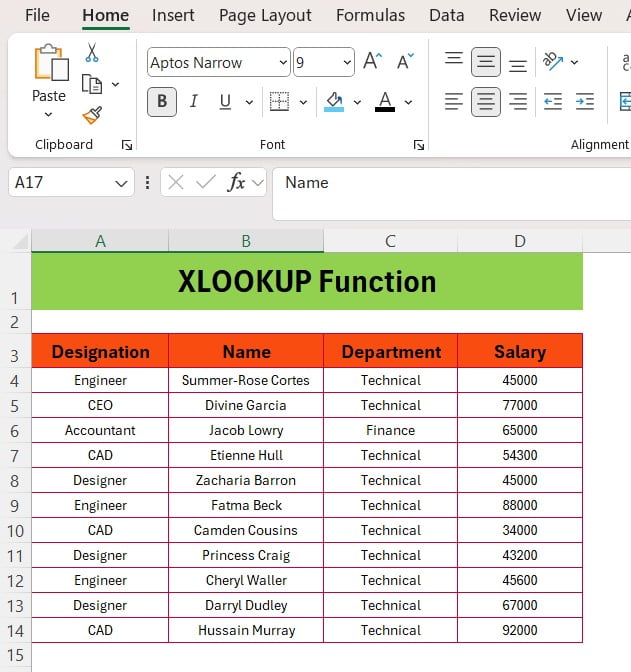
For this tutorial, we’ll be working with a simple data table that contains four columns: Designation, Name, Department, and Salary. These columns are located in the Excel ranges as follows:
Now, imagine we want to look up specific details like the Designation, Name, or Salary for a person. The XLOOKUP Function in Excel makes this a breeze!
Using XLOOKUP to Retrieve Data
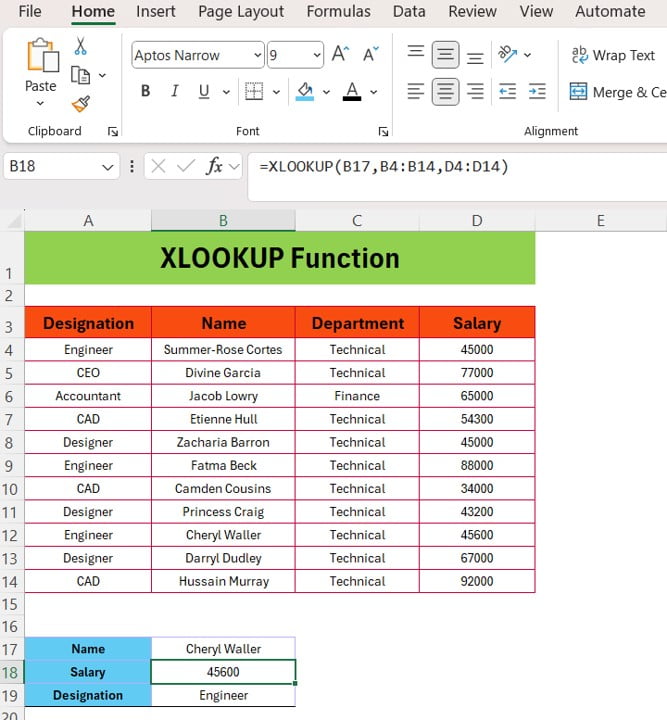
Let’s start with an example where we want to find the Salary of a person based on their name. Suppose you want to know the salary of “Cheryl Waller.” Instead of manually scanning through rows of data, you can use the XLOOKUP Function in Excel to quickly fetch the information.
Here’s how you can do it:
Formula to find the Salary:
=XLOOKUP (B17, B4:B14, D4:D14)
In this formula:
- B17:is the cell where you type the name you’re searching for (e.g., Cheryl Waller).
- B4:B14 is the range where the names are listed.
- D4:D14 is the range containing the corresponding salaries.
This formula looks up the name in column B and returns the matching salary from column D. Simple, right?
Formula to find the Designation:
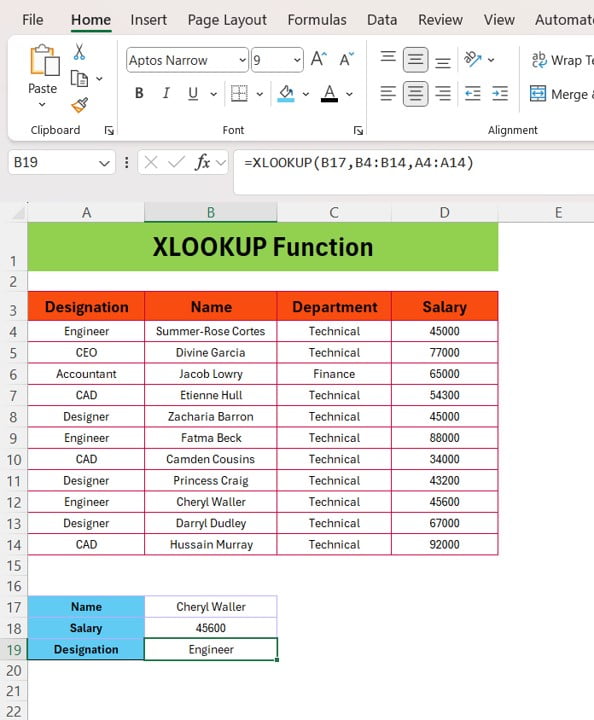
If you need to find Cheryl Waller’s Designation, you can use a similar formula:
=XLOOKUP (B17, B4:B14, A4:A14)
Here:
- The name is still searched in B4:B14.
- Instead of salary, this time the formula returns the Designation from column A4:A14.
Example Output
When we use these formulas in Excel, here’s what we get:
- Name: Cheryl Waller
- Designation: Engineer
- Salary: 45,600
And just like that, you’ve retrieved all the necessary information without any manual scrolling or searching!
Why You Should Start Using XLOOKUP Today
Now that you’ve seen how easy it is to use XLOOKUP, here’s why you should incorporate it into your daily Excel workflow:
- Versatile: You can look up values in any direction—no more limitations of VLOOKUP!
- Flexible: Provides a more user-friendly experience with added options like handling errors and matching modes.
- Powerful: Works with large data sets, making your lookups faster and more efficient.
Wrapping Up
In this post, we’ve walked through the basics of using the XLOOKUP function with a practical example. We retrieved Name, Designation, and Salary from a simple data set in just a few seconds. If you’re still using VLOOKUP, it’s time to make the switch!
If you found this guide helpful, be sure to check out our video tutorial for even more insights. Happy Excel-Ing!
Visit our YouTube channel to learn step-by-step video tutorials
View this post on Instagram
Click hare to download the practice file
