Are you ready to unlock the power of Excel formulas with the CHOOSEROWS function? In this post, we’ll walk you through how to use this handy function with real data examples. By the end, you’ll see how simple it is to extract specific rows from a dataset, saving time and making your work more efficient.
What is the CHOOSEROWS Function in Excel?
The CHOOSEROWS function in Excel allows you to select specific rows from a given dataset. Whether you need to extract important data points or want to display only relevant rows, CHOOSEROWS makes it a breeze. It’s a great alternative when working with structured data, especially if you don’t want to manually filter rows.
Using the CHOOSEROWS function, we’ll achieve this in no time!
CHOOSEROWS Formula: Step-by-Step Guide
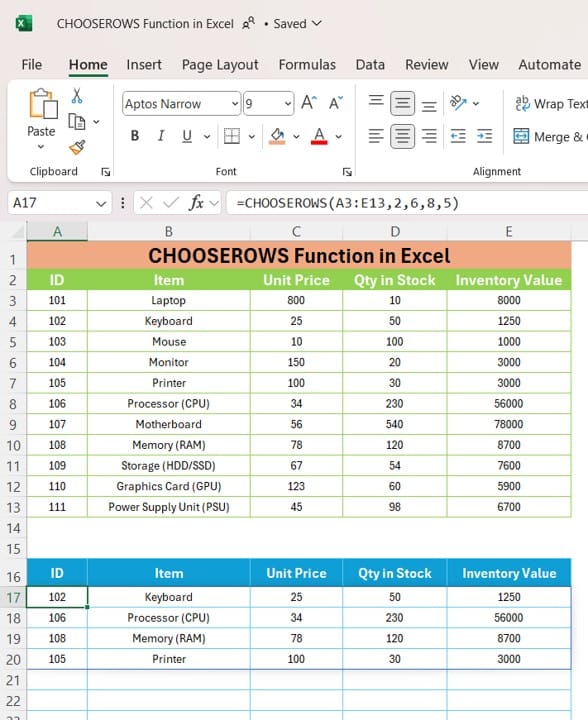
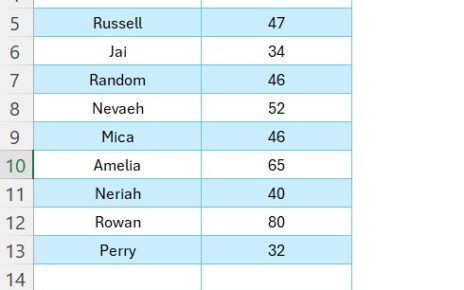
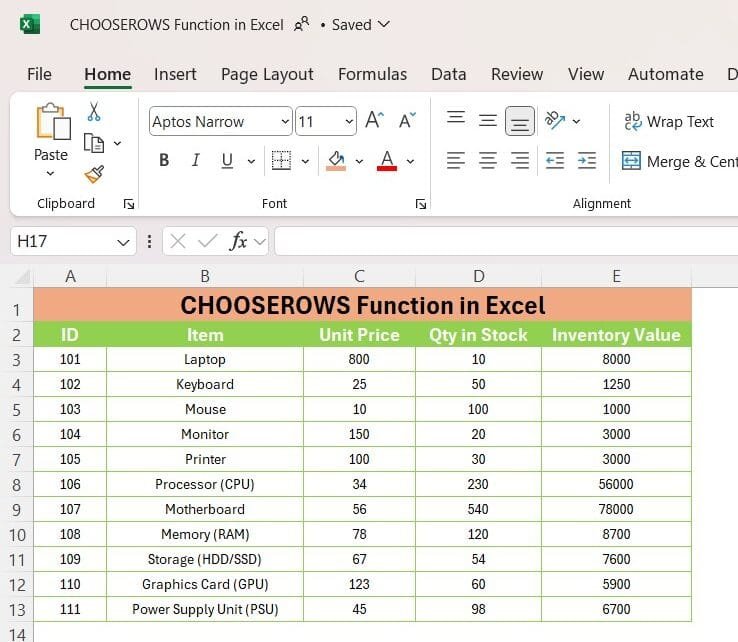
Here’s the formula we used to extract rows 2, 6, 8, and 5 from our dataset (which correspond to IDs 102, 106, 108, and 105):
=CHOOSEROWS (A3:E13, 2, 6, 8, 5)
Formula Breakdown
- A3: This is the range of the dataset we are working with.
- 2, 6, 8, 5: These numbers refer to the row numbers in the given range that we want to extract.
As you can see, the formula automatically pulls the selected rows without needing to manually copy-paste the data. This makes your work faster and much more organized!
Why Use CHOOSEROWS in Excel?
If you’re wondering why CHOOSEROWS is such a helpful tool, here are some reasons:
- Faster Data Analysis: Select only the rows you need without any extra steps.
- Saves Time: No manual filtering or copying required—just one formula does the trick!
- Versatile Usage: Works great for reports, dashboards, and data validation tasks.
Wrap-Up: Make Data Handling Easy with CHOOSEROWS
Using the CHOOSEROWS function in Excel is a game-changer when you need to work with large datasets but only care about specific rows. With a single formula, you can extract exactly what you need, avoiding clutter and unnecessary work. Try this function on your own data, and you’ll quickly see how it makes your Excel experience more efficient!
Visit our YouTube channel to learn step-by-step video tutorials
View this post on Instagram
Click hare to download the practice file