In this article, we have demonstrated our new Excel VBA tool Complaint Management System V1.0. This is ready to use tool for the process of managing customer complaints or IT Ticketing or Service Request Management. It is an Excel and VBA based Tool. Data is saved in the same Excel.
Key features of Complaint Management System V1.0:
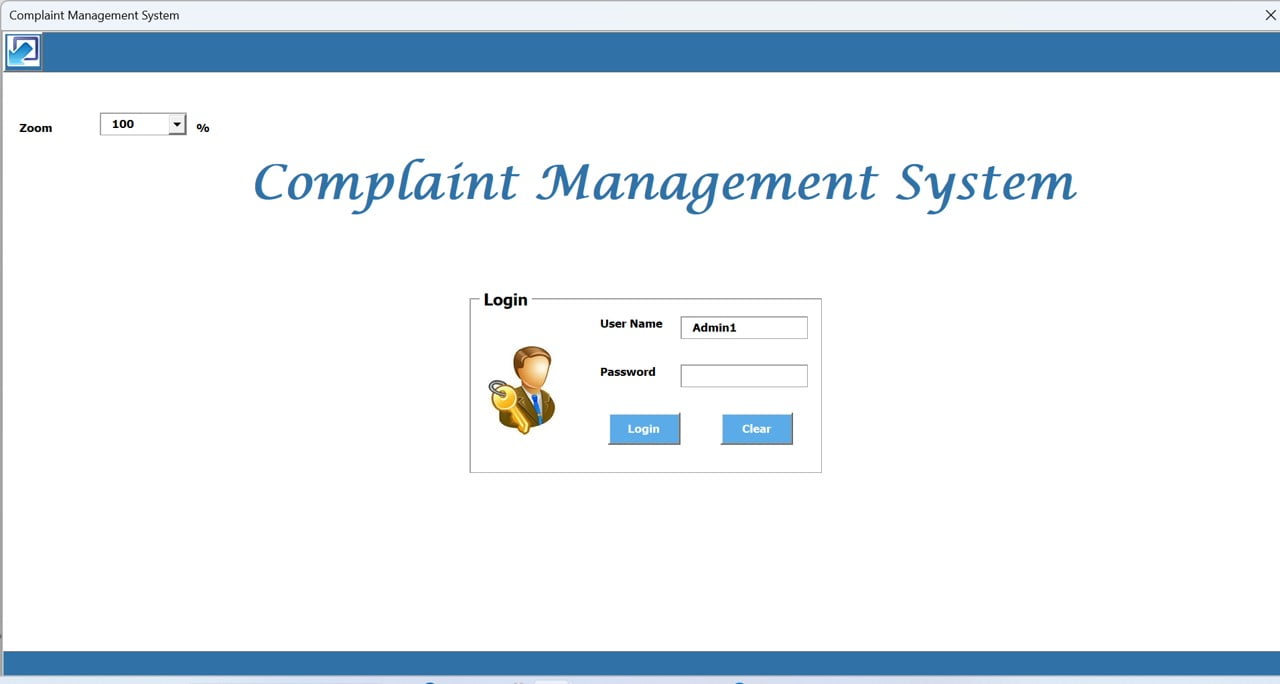
Login Form:
As you open the Excel workbook, Login form will be loaded automatically. Here you can enter the default user ID “Admin1” and Password “abcd”.
Click to buy Complaint Management System V1.0 in Excel
Main Form:
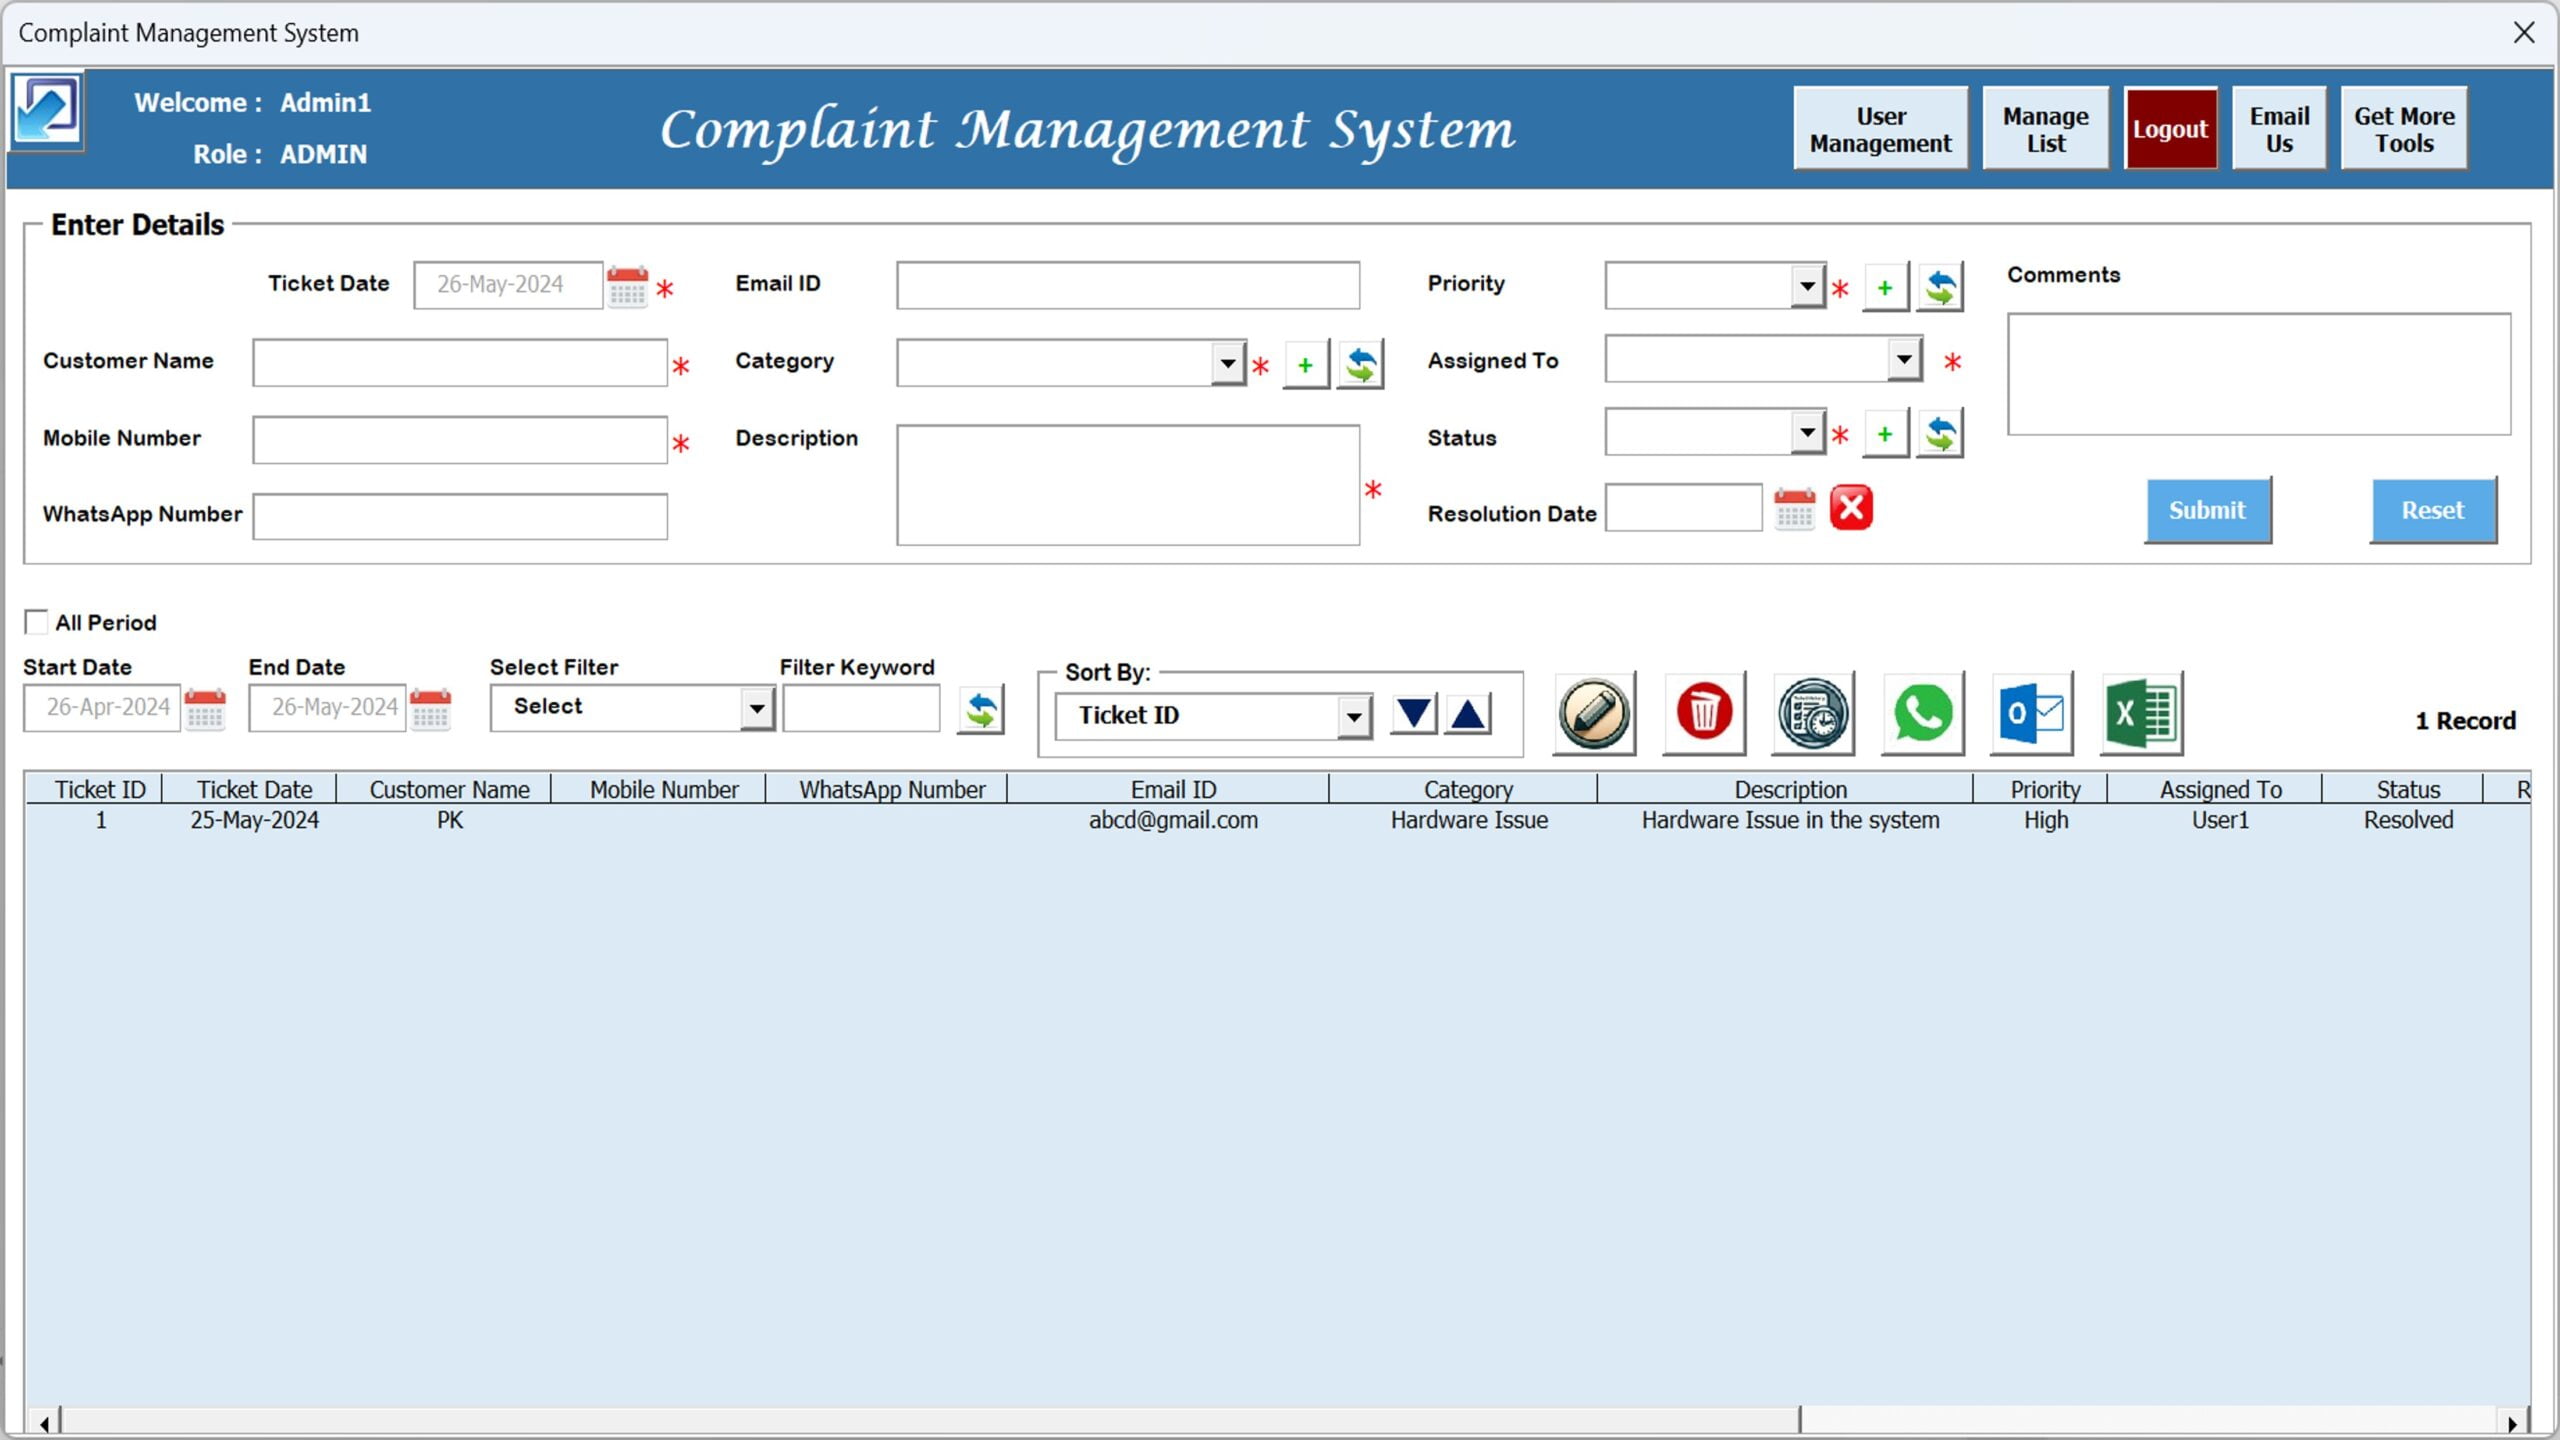
After a successful login, Main form will be opened. Below are the feature of main form:
Click to buy Complaint Management System V1.0 in Excel
Maximize and Minimize button:
On top left corner, we have given a minimize and maximize button. If form is in maximize mode then it will be minimized and if it is in the minimize mode then it will be maximized.

Feature buttons:
On the top right corner of the screen, we have given 5 feature buttons as given below:

Click to buy Complaint Management System V1.0 in Excel
User Management:
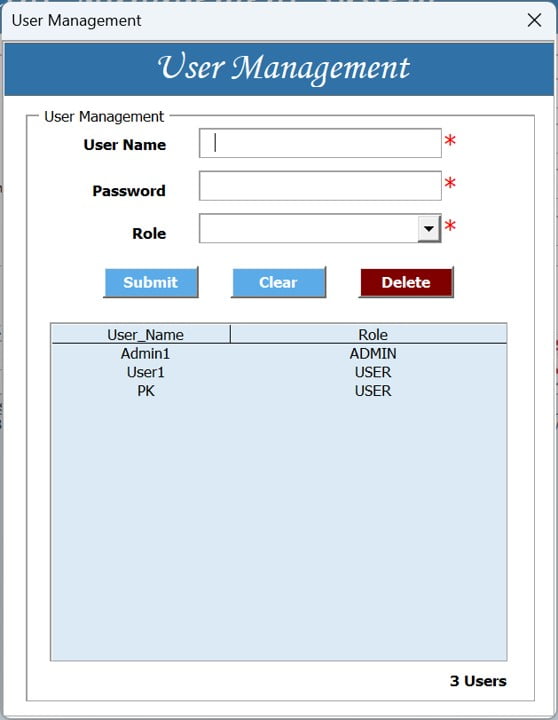
This button will open the User Management Window. Using the user management window, you can create new user and you can modify the existing role of the user as well as you can delete the user from this window. if you have a USER Role then you can change your password only.
Click to buy Complaint Management System V1.0 in Excel
Manage List:
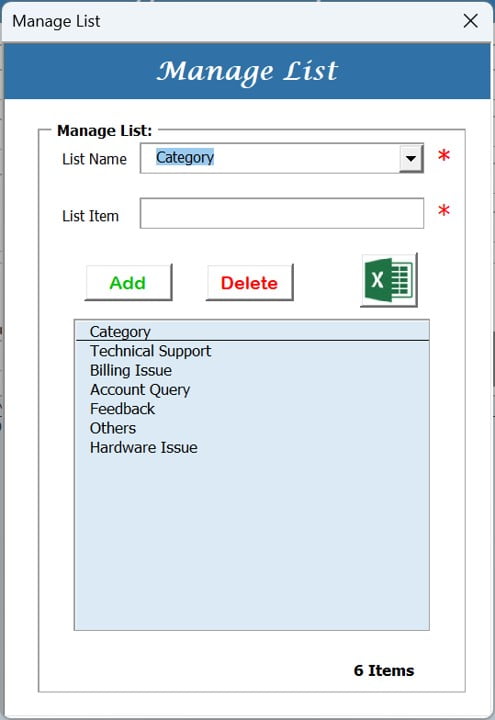
Using this window, you can manage the list of drop downs for this tool. You can add new item in the list, or you can remove the existing item. You can fetch the data into a new excel also.
Click to buy Complaint Management System V1.0 in Excel
Logout:
Using the logout button, you can log out from the tool.
Email Us:
This button will show our email ID so that you can send us an email for any customization or modification.
Get More Tools:
This button will navigate to our product page of our website to see so that you can see the how are new products
Raise a Ticket using Enter Data:
You can enter the information into Enter data section with all mandatory fields and click on submit. New Ticket will be generated and will be appeared in the data section.

Click to buy Complaint Management System V1.0 in Excel
Data Section:
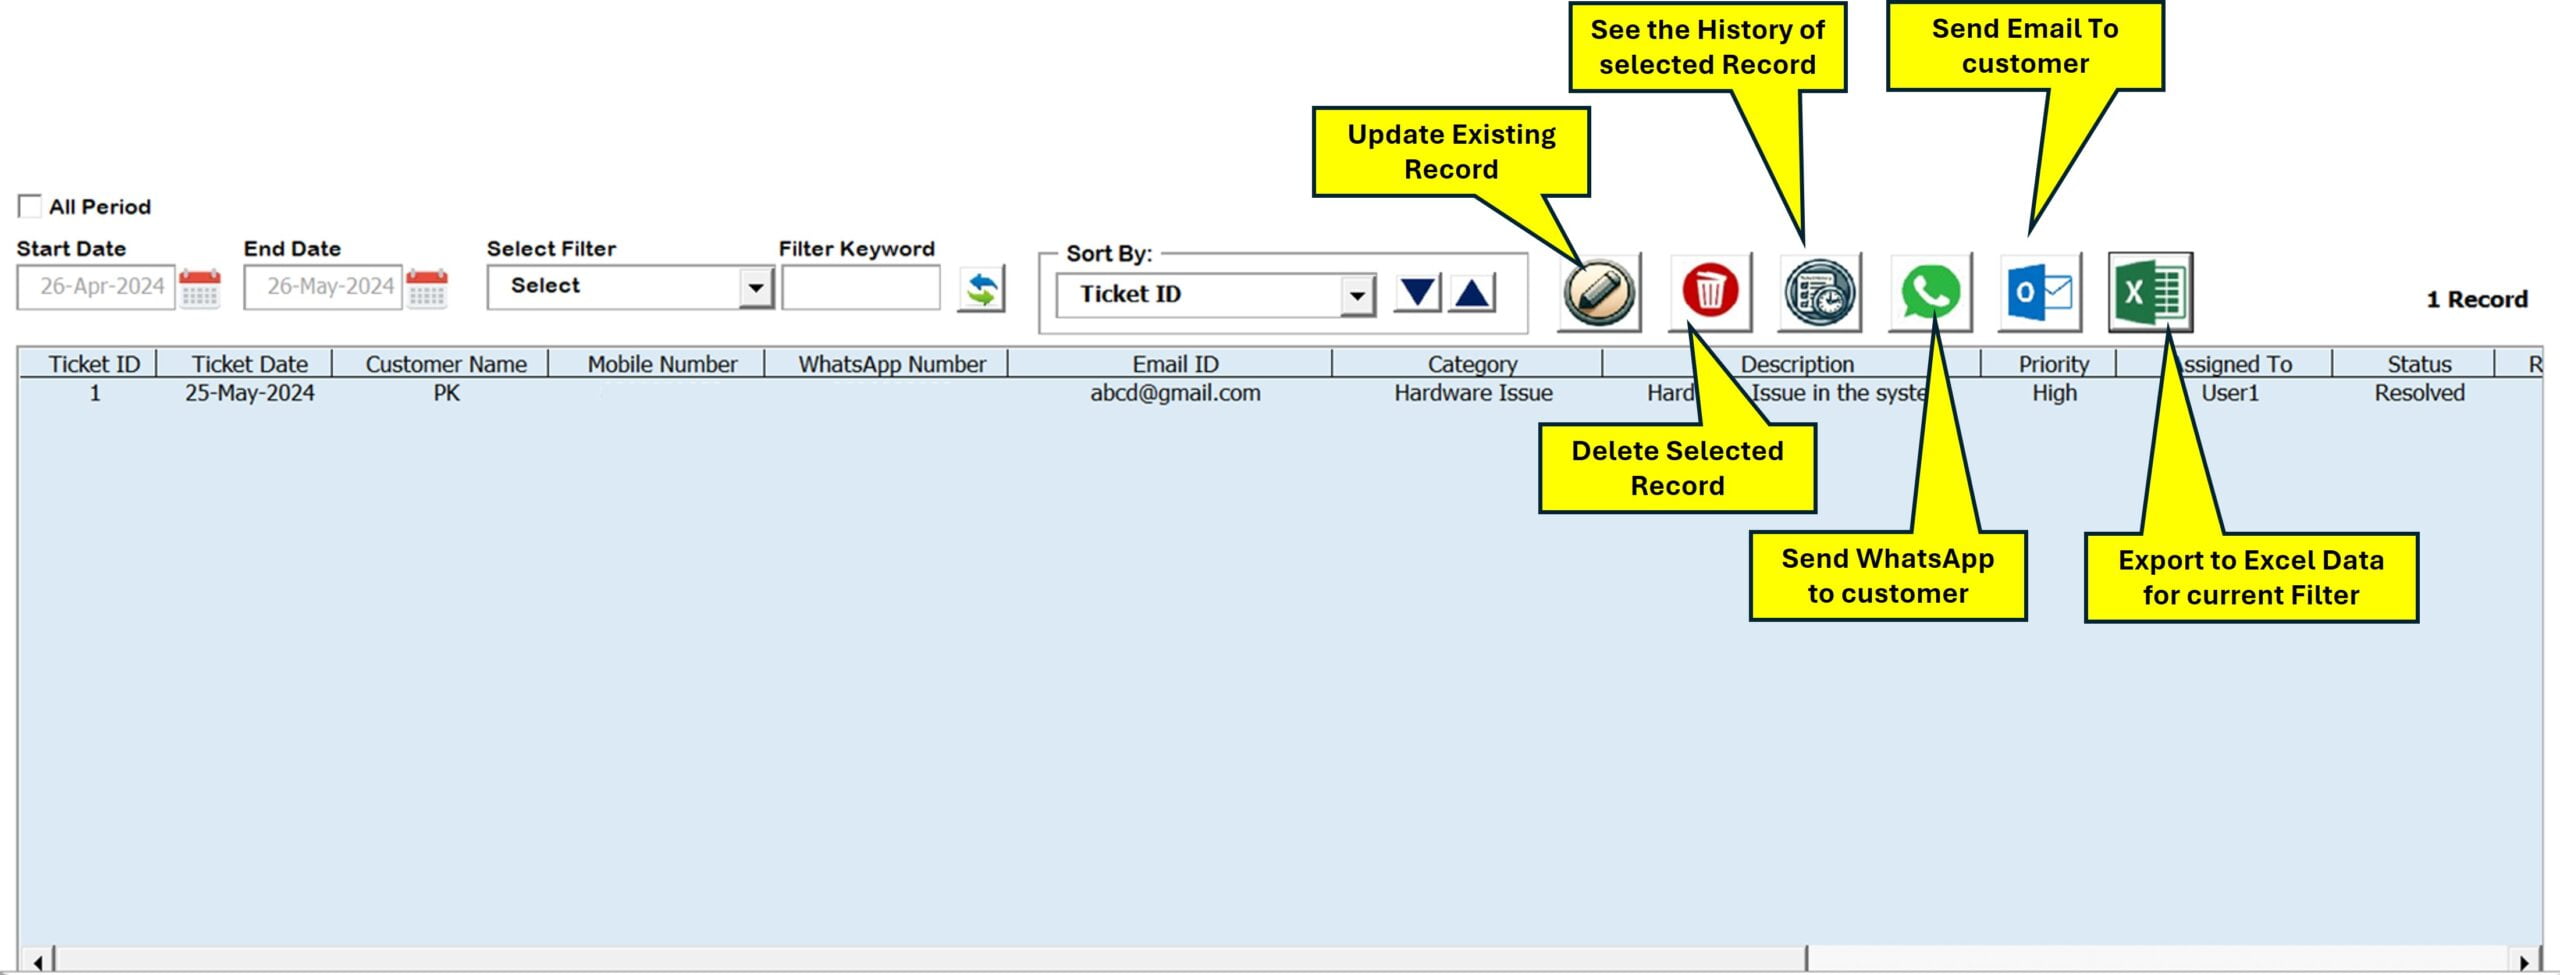
In this section, we have a list box, wherein we are showing the ticket data. In this section, we have below given features:
Click to buy Complaint Management System V1.0 in Excel
Date Range Filter:
You can select the start date and End data to filter the data for a period. By default, it will show rolling 30 days data. We have given a check box to select the All Periods also. If you want to see the data for all Periods, just check it. You select a filed name also from Select Filter drop-down and just input your filter keyword in the Filter Keyword box and click on Refresh. Data will be filtered accordingly.
Sort By:
You can sort the data using this drop-down. Click on ascending or descending button to sort after selecting the filed name.
Update Existing Record Button:
Just select a record in the list box and click on this button. It will pre filled the information of selected record in the Enter data section. Change the information and click on Submit button to update it. You can double click also on the record to apply this step.
Delete Record Button:
Using this you can delete a selected record from data.
Show Ticket History Button:
If you want to see the history or audit trail of a record. It will open a new window with the all update in details. You can export to Excel also these records.
WhatsApp to Customer Button:
If you have entered the customer’s WhatsApp number, you can send the WhatsApp from here. Just select a record and click on this button. It will open the new tab in your default web browser for web WhatsApp. For the first time, you have to login into the web WhatsApp.
Email to Customer Button:
Using this button, you can open an Outlook new email wherein customer’s email id will be in “To” section.
Export to Excel Button:
You can export the list box data into a new Excel file. It will extract the Filtered data so You can extract the data for reporting or analysis from here as you want.
Visit our YouTube channel to learn step-by-step video tutorials
Watch the step-by-step demo Video:
Click to buy Complaint Management System V1.0 in Excel


