In the world of sales and customer relationship management, maintaining strong and consistent communication with clients is essential for business success. One of the best ways to ensure this is through a Client Follow-Up Checklist.
Key Features of the Client Follow-Up Checklist Template
The Client Follow-Up Checklist Template is designed to be simple yet highly effective. It consists of two main worksheets that make it easy to use and customize according to the needs of your business.
1. Client Follow-Up Checklist Sheet
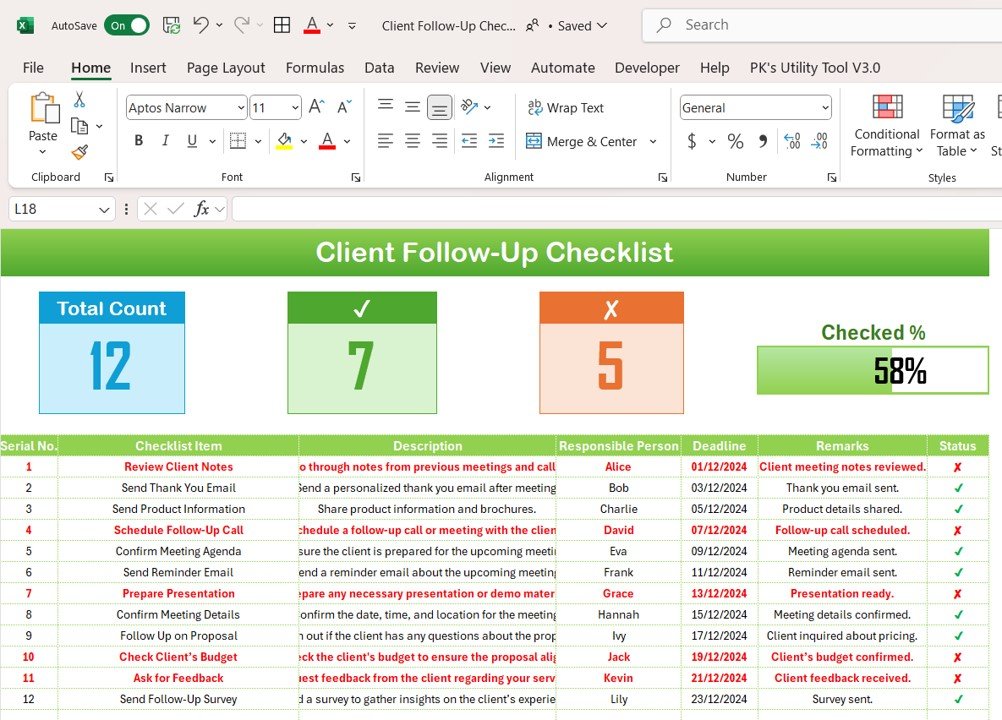
This is the main sheet where all the checklist information is captured. The layout is organized into two main sections: the Top Section and the Checklist Table.
Top Section: Overview and Progress Tracking
The Top Section of the worksheet provides a quick overview of the checklist’s progress. It includes:
- Total Count: This tracks the total number of checklist items.
- Checked Count: This shows how many tasks have been completed.
- Crossed Count: This indicates the tasks that have been marked as irrelevant or canceled.
- Progress Bar: A visual representation of the progress made based on the number of tasks completed.

Checklist Table: Core Tracking Section
The Checklist Table is where you will input and manage the core follow-up tasks. It includes the following columns:
- Serial No.: A unique identifier for each task.
- Checklist Item: Describes the follow-up activity to be completed.
- Description: Provides additional details or context about the task.
- Responsible Person: The individual responsible for completing the task.
- Deadline: The date by which the task must be completed.
- Remarks: Any important notes or observations related to the task.
- Status: Here, the user can mark the task as ✔ (completed) or ✘ (not completed).
By updating the Status column regularly, the team can keep track of which follow-ups have been completed, pending, or require attention.
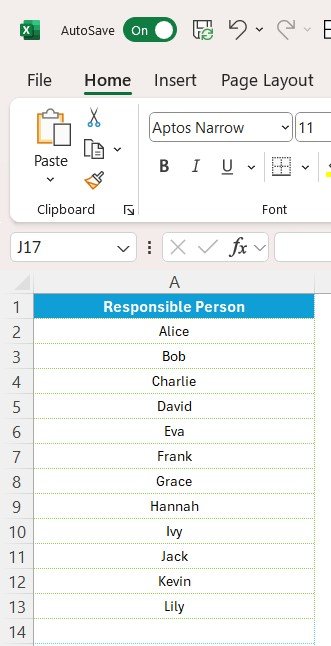
2. List Sheet Tab: Responsible Person List
The List Sheet Tab is a supplementary sheet that captures a unique list of responsible persons. It is used to create a drop-down list for the Responsible Person column in the main checklist. This ensures consistency and prevents errors when assigning tasks to individuals.


