Hey there! If you’re like most businesses, managing expense reimbursements can be a bit of a headache. But, good news! An intuitive Excel-based Expense Reimbursement Tracker is here to streamline the whole process. It’s designed to ensure everything runs smoothly and accurately, keeping your financial operations tight and timely.
Click to buy Expense Reimbursement Tracker in Excel
What’s an Expense Reimbursement Tracker?
Well, it’s a super handy tool that organizations use to manage the expenses their employees rack up on the company’s behalf. These expenses are later reimbursed to the employees. By using a structured tracker, you’re making sure every penny is accounted for accurately and swiftly, which helps maintain your company’s financial integrity.
Click to buy Expense Reimbursement Tracker in Excel
Loaded with Features
This Excel tool isn’t just functional; it’s packed with features to make expense tracking both comprehensive and simple:
Dashboard:
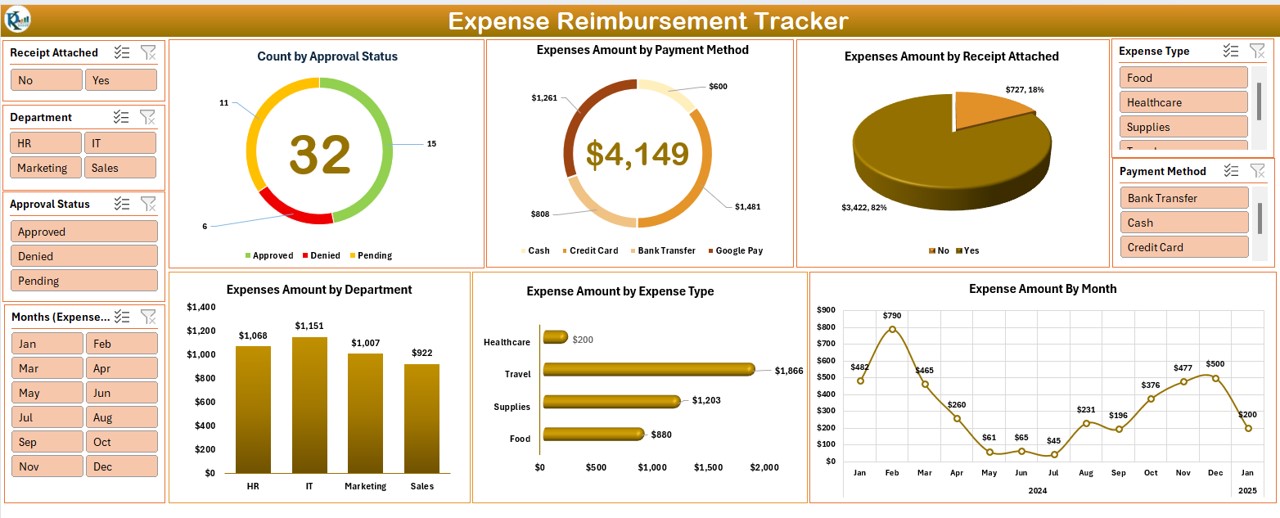
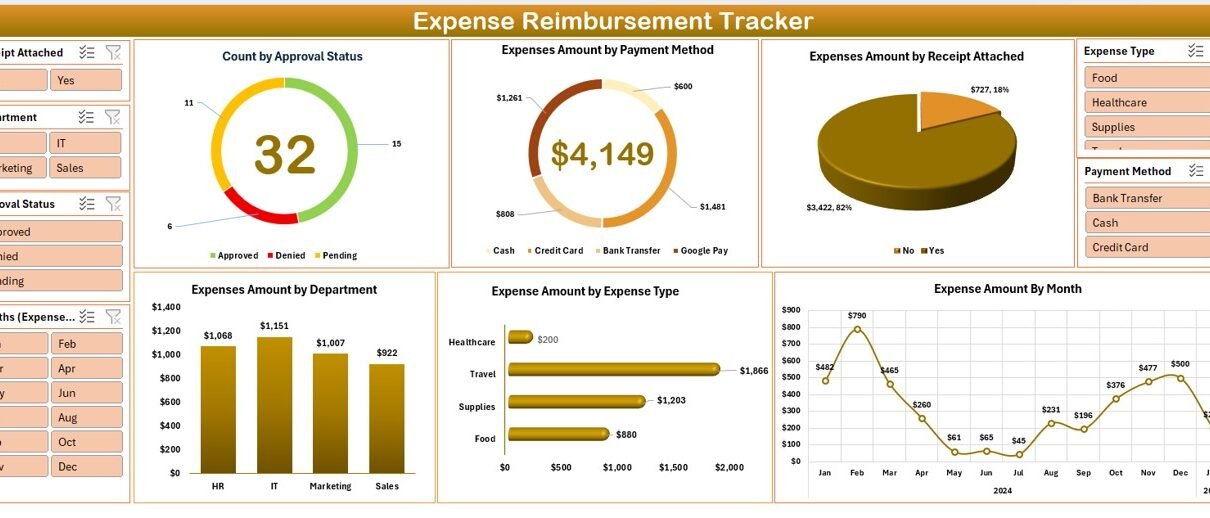
- Get a visual summary of expenses with colorful charts like doughnut charts for payment methods and approval statuses, pie charts for receipt attachments, and line charts that show trends over months.
Click to buy Expense Reimbursement Tracker in Excel
Data Sheet Tab:
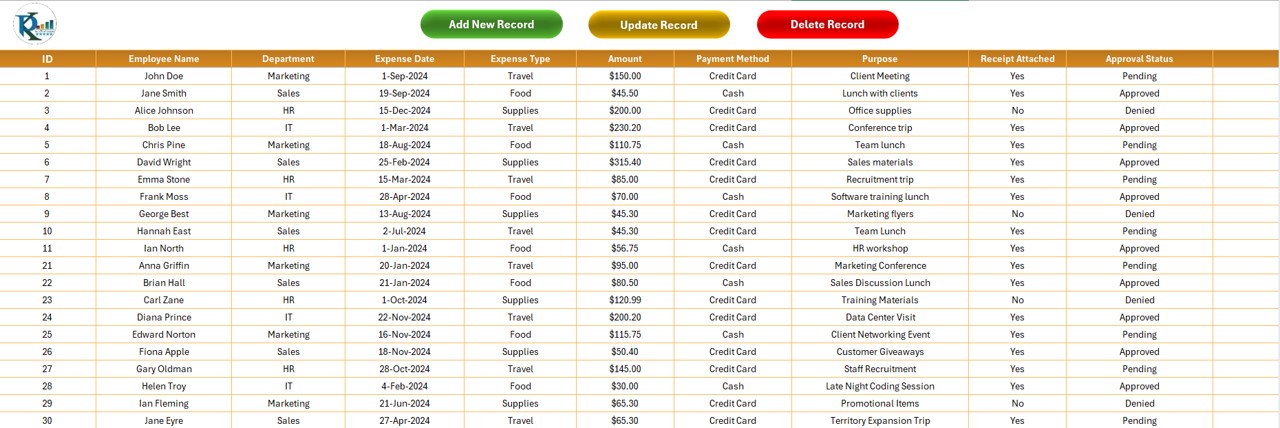
- Here’s where you’ll enter details such as Employee Name, Department, Expense Date, Type, and Amount. Plus, there are interactive buttons to add, update, or delete records.
Add New Record:
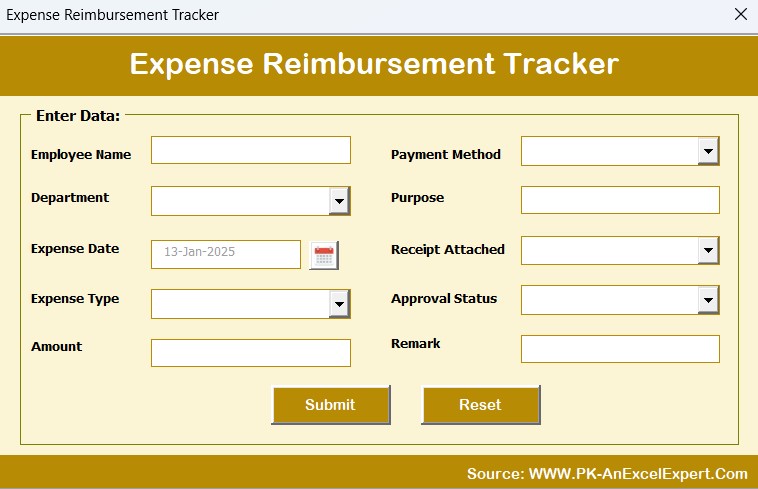
- To add a new record, you can use this button. It will open a data entry form. You can fill the information and click on submit. It will add the data on the sheet and will refresh the dashboard sheet also.
Click to buy Expense Reimbursement Tracker in Excel
Update Record:
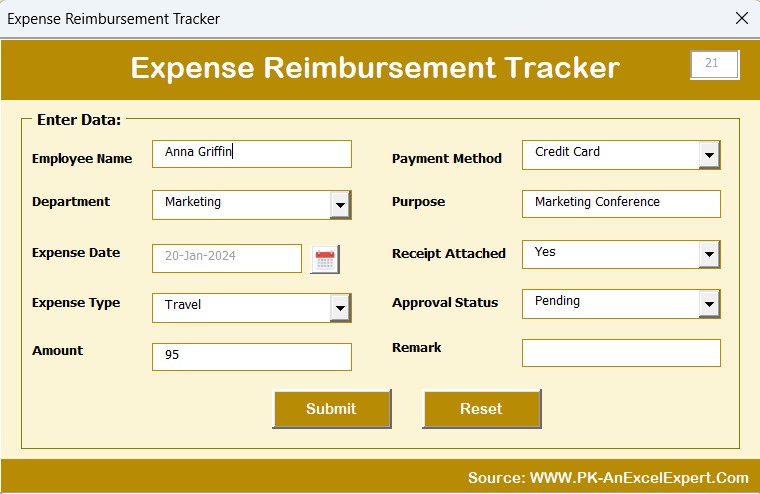
- If you want to update the existing record, then just click on the Id of that record and click on the update Record button. It will open the same form but with prefilled information. You can change the information in the form and click on submit button.
Delete Record:
- To delete a record from Sales sheet, just select the id of the record and click on the Delete Record button. It will confirm before deleting the record.
List Sheet Tab:

- This one helps keep your dropdown lists for data entry neat and uniform.
Support Sheet Tab:

- It houses pivot tables that power the dashboard charts. You can keep this sheet out of sight if you prefer a cleaner look.
Why You’ll Love It
Using an Expense Reimbursement Tracker in Excel comes with a bunch of perks:
- Accuracy: It slashes those pesky human errors that come with manual entries.
- Timeliness: Dashboard updates instantly with new data inputs, giving you the freshest insights.
- Adaptability: Customize it to fit the unique needs of your organization.
- User-Friendly: The interface is straightforward, perfect even for those just getting started with Excel.
Click to buy Expense Reimbursement Tracker in Excel
Best Practices for Stellar Results
To get the most out of your expense tracker, here are some tips:
- Update Regularly: Keep the tracker fresh with the latest data to ensure accuracy.
- Secure Data: Always store your tracker securely to protect sensitive info.
- Conduct Regular Audits: Check in on your tracker and its processes periodically to keep them sharp and compliant.
- Provide Training: Make sure all users know their way around the tracker to maximize its potential.
- Setting Up Your Tracker: A Step-by-Step Guide
Ready to roll?
Here’s how to get your Expense Reimbursement Tracker up and running:
- Set Up the Worksheets: Configure the four main worksheets as outlined above.
- Populate Dropdown Lists: Fill in the List sheet with necessary categories like department names and expense types.
- Begin Data Entry: Use the Data Entry form to start adding new records or tweaking existing ones.
- Engage with the Dashboard: Dive into the Dashboard to visually analyze and track expenses with dynamic charts.
FAQs to Get You Further
Q1: How do I add a new expense record?
A1: Just hit the ‘Add New Record’ button, pop in the details on the data entry form, and submit to update the sheet and refresh the dashboard.
Q2: Can I update an existing expense record?
A2: Absolutely! Select the ID of the record you wish to change, click ‘Update Record’, modify the info on the form, and submit.
Q3: What if I need to delete an expense record?
A3: Choose the ID of the record and press the ‘Delete Record’ button. Confirm your intention, and it’s done.
Q4: How secure is the Expense Reimbursement Tracker?
A4: It’s as secure as you make it. Regular updates and backups are crucial to prevent unauthorized access.
Click to buy Expense Reimbursement Tracker in Excel
Visit our YouTube channel to learn step-by-step video tutorials
Watch the step-by-step video tutorial:
Click to buy Expense Reimbursement Tracker in Excel
