Are you curious about how to break down a date into its individual components like day, month, and year in Excel? Well, you’re in the right place! In this blog post, we’ll dive into the Day Month and Year Function in Excel using an example dataset. These functions come in handy when you want to analyze or manipulate dates more easily.
Day Month and Year Function in Excel
Understanding the Dataset
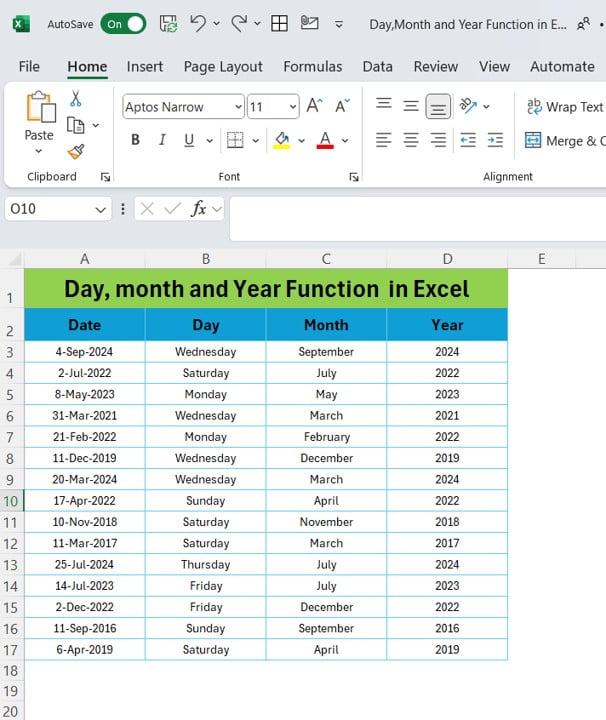
Before we get into the functions, let’s take a quick look at the data we’ll be working with. Below is a simple dataset that includes several dates. We want to extract the Day Month and Year Function in Excel from these dates using the TEXT function.
As you can see, the dataset covers different years and months, providing us with a great range of examples to work with.
Extracting the Day, Month, and Year in Excel
Now that you’ve seen the data, let’s explore how to use Excel’s TEXT function to extract the day, month, and year from a given date.
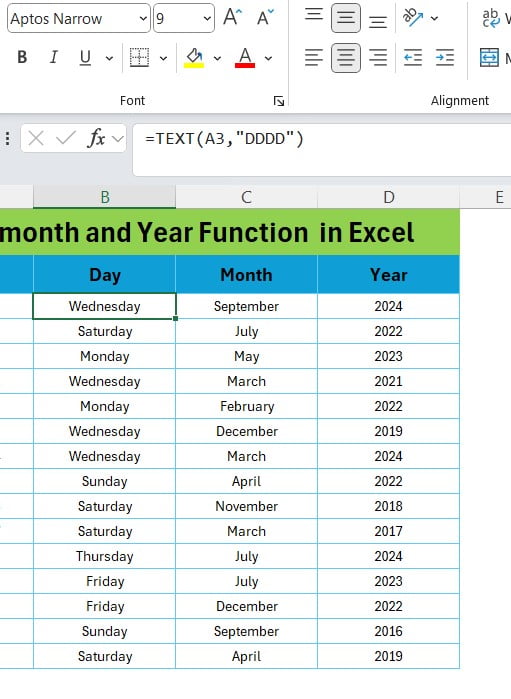
Formula to Extract the Day
To pull out the day from a date, you can use the following formula:
=TEXT (A2, “DDDD”)
This formula will return the full name of the day, such as “Wednesday” or “Saturday”, from the date in column A.
For instance:
If the date is 4-Sep-2024, the formula will return “Wednesday.”
If the date is 2-Jul-2022, it will return “Saturday.”
Formula to Extract the Month
To extract the month, we can use this formula:
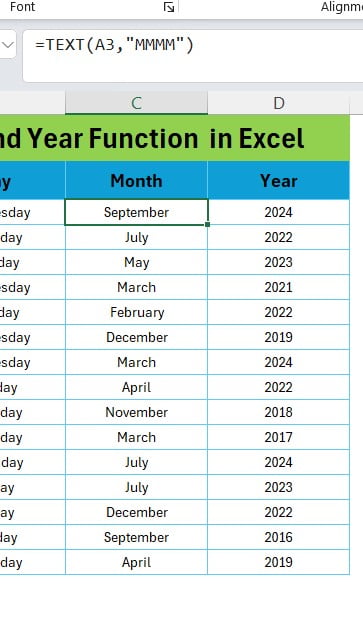
=TEXT (A2, “MMMM”)
This will give you the full name of the month, like “September” or “July”.
For example:
If the date is 4-Sep-2024, the formula will return “September.”
If the date is 2-Jul-2022, it will return “July.”
Formula to Extract the Year
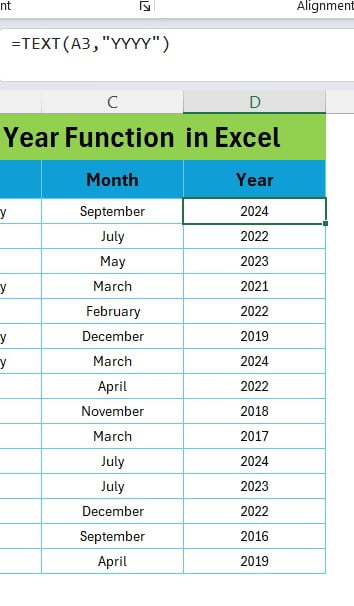
Finally, to get the year from the date, use this simple formula:
=YEAR(A2)
This will return the four-digit year, such as 2024 or 2022.
For example:
If the date is 4-Sep-2024, the formula will return “2024.”
If the date is 2-Jul-2022, it will return “2022.”
Applying the Formulas to the Dataset
Now, let’s apply these formulas to the dataset we discussed earlier. By entering the formulas in Excel and dragging them down, you can quickly extract the day, month, and year from each date in your dataset.
- Day Formula: Enter =TEXT (A2, “DDDD”) in the Day column.
- Month Formula: Enter =TEXT (A2, “MMMM”) in the Month column.
- Year Formula: Enter =YEAR(A2) in the Year column.
Here’s How It Looks in Practice:
For the date 4-Sep-2024:
The day will be Wednesday.
The month will be September.
The year will be 2024.
And that’s all there is to it! Now you’ve successfully extracted the day, month, and year from the date.
Wrapping It Up
Working with dates in Excel doesn’t have to be complicated. By using simple functions like TEXT, DAY, MONTH, and YEAR, you can quickly break down any date into its individual components. Whether you’re working on reports, data analysis, or just organizing information, these functions make it easy to handle dates in a more flexible way.
So, go ahead and try these formulas on your own data. You’ll be amazed at how much more manageable your dates become with just a few clicks!
This blog post is designed to keep the reader engaged by using a friendly tone, clear transitions, and examples that illustrate how easy it is to use the functions. Let me know if you need any further adjustments!
Visit our YouTube channel to learn step-by-step video tutorials
View this post on Instagram

