If you’re diving into Excel and looking to enhance your data analysis skills, the IF Function in Excel is a must-have tool in your arsenal. In this blog post, we’ll walk you through exactly how to use the IF Function in Excel with easy-to-understand examples. Whether you’re a beginner or just brushing up on your Excel know-how, this guide is designed to be practical, conversational, and packed with examples you can start using right away!
What is the IF Function?
The IF Function in Excel is a logical function that checks a condition and returns one value if the condition is TRUE and another value if it is FALSE. Think of it as a way to automate decision-making in your spreadsheet.
For instance, imagine you’re grading students based on their marks. You want Excel to automatically assign a “PASS” or “FAIL” status depending on whether a student’s marks meet a certain threshold. That’s where the IF function shines!
Understanding the Syntax
Here’s the basic syntax for the IF function:
=IF (logical_test, value_if_true, value_if_false)
- logical test: This is the condition you want to evaluate (e.g., is a student’s mark greater than 30?).
- value_if_true: This is the result if the condition is TRUE (e.g., “PASS”).
- value_if_false: This is the result if the condition is FALSE (e.g., “FAIL”).
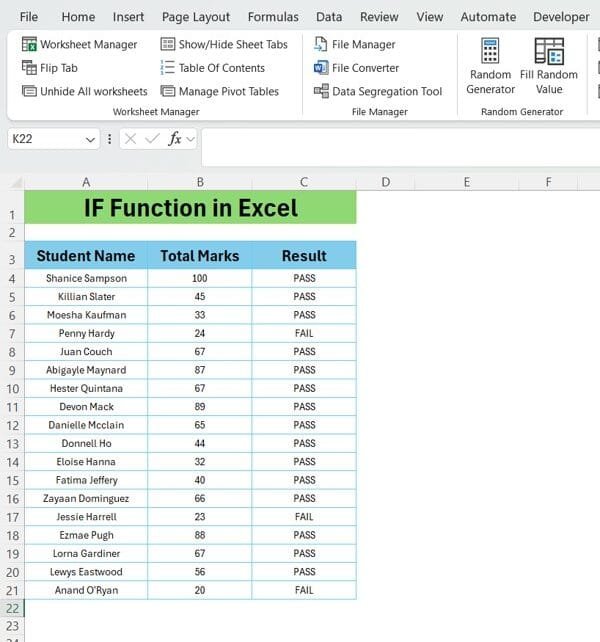
The Data We’ll Use
Let’s get into a real-life example! For this tutorial, we have a set of student data that we’ll be working with. The data contains three columns:
- Student Name (Range A3)
- Total Marks (Range B3)
- Result (Range C3)
Applying the IF Function
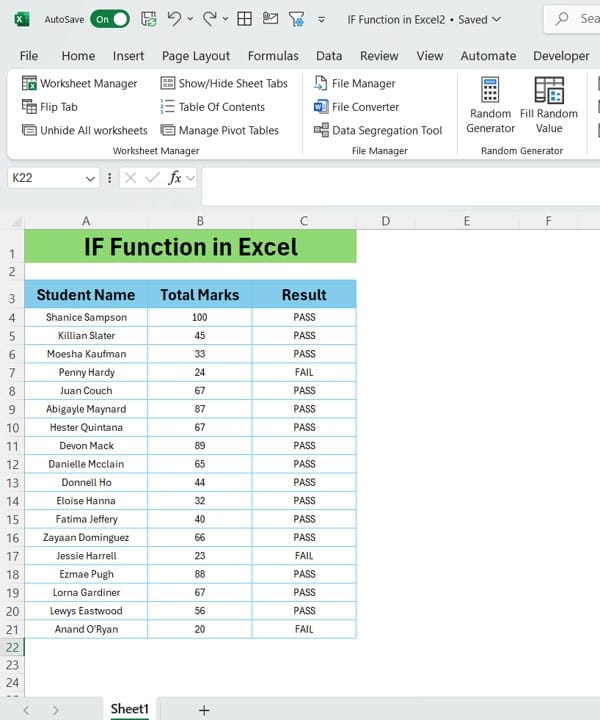
Now, let’s apply the IF Function in Excel to automatically assign a “PASS” or “FAIL” result based on each student’s total marks.
Step-by-Step Process:
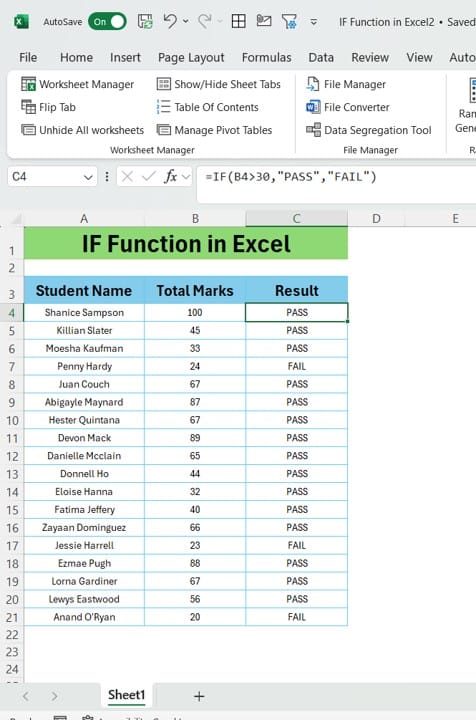
- Select the cell where you want the result (in our case, that’s cell C4).
- Enter the following formula:
=IF(B4>30,”PASS”,”FAIL”)
This formula checks whether the value in cell B4 is greater than 30. If it is, Excel returns “PASS.” Otherwise, it returns “FAIL.”
- Press Enter and copy the formula down for the rest of the rows in the Result column.
Voila! Excel has now automatically evaluated each student’s marks and assigned them a PASS or FAIL status.
Let’s break down the formula:
- B4>30: This is our condition, checking if the student’s total marks are greater than 30.
- “PASS”: If the condition is TRUE (the student scored more than 30), Excel will return “PASS.”
- “FAIL”: If the condition is FALSE (the student scored 30 or less), Excel will return “FAIL.”
Why Use the IF Function?
The IF Function is one of the most versatile and powerful tools in Excel. It helps you:
- Automate decision-making: Excel does the thinking for you based on the conditions you set.
- Save time: Instead of manually entering “PASS” or “FAIL,” Excel does it all with one formula.
- Increase accuracy: Using a formula reduces the chance of human error when working with data.
Conclusion
The IF function in Excel is a simple yet incredibly effective tool for decision-making in your spreadsheets. By following the steps outlined in this guide, you can easily automate tasks like assigning grades, evaluating conditions, or categorizing data.
So, go ahead and try it out! The next time you’re dealing with conditional data, you’ll be ready to let Excel do the work for you with the IF Function.
Visit our YouTube channel to learn step-by-step video tutorials
View this post on Instagram
Click hare to download the practice file